Learn how to use parent pages in InDesign
A parent page (previously known as master page) is like a background that you can quickly apply to many pages. Objects on a parent page appear on all pages applied. Parent page items that appear on document pages are surrounded by a dotted border. Changes you make to a parent page are automatically applied to associated pages that commonly contain repeating logos, page numbers, headers, and footers. They can also contain empty text or graphic frames that serve as placeholders on document pages. A parent item cannot be selected on a document page unless overridden.
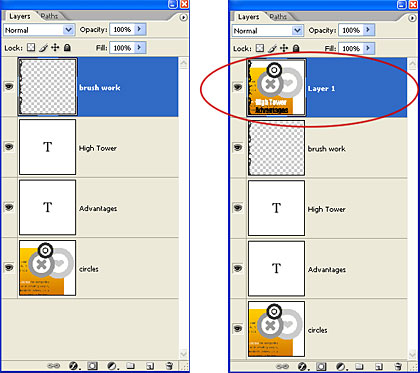
Parents can have multiple layers, just like pages in your document. Objects on a single layer have their own stacking order within that layer. Objects on a parent page layer appear behind objects assigned to the same layer in the document page.
If you want a parent item to appear in front of objects on the document page, assign a higher layer to the object on the parent. A parent item on a higher layer appears in front of all objects on lower layers. Merging all layers will move parent items behind document page objects.
Why You Must Learn Adobe Photoshop
If there’s one thing that is for sure, technology is always changing. And with new technology comes new ways to create and communicate. For kids today, learning Photoshop skills is not only a fun way to pass the time – it’s a necessity. Adobe Photoshop is an important tool for children to learn these days. It is used by photographers, graphic designers, and other creative professionals to create digital art, graphics, and even entire websites.
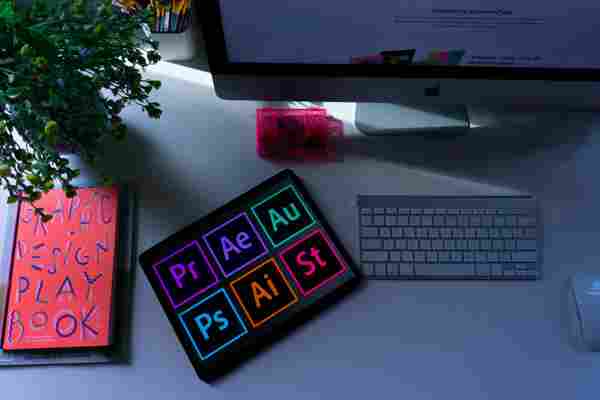
Learning Photoshop can give kids a huge advantage in the digital age. They will create their own artwork, photos, and designs, instead of consuming them.
Photoshop is not as difficult to learn as some people think – there are plenty of tutorials and photoshop courses for kids & teens online. So why not give it a go? Your child could excel in digital art!
5 Reasons to Learn Adobe Photoshop Skills
Here are a few reasons why every kid should learn how to use Adobe Photoshop:
1. Interactive design is the future.
Decades ago, designers used physical print media to create ads for companies. Nowadays, they work with other advertisements like vinyl graphics that can be applied on billboards or buses instead.
To stay afloat in this ever-changing industry, creative professionals must develop their user experience sensitivity and learn how interactivity works. Thus, kids today should be well versed with all applications of creativity, such as Photoshop.
Photoshop is an essential tool for all interactive projects. It allows children to create images that will fit perfectly into web pages without looking pixelated when magnified up close. This program also has other tools for maximum flexibility during customisation periods.
2. Adobe Photoshop is a virtual standard.
The world of design can be a very intimidating place. You have to navigate the various programs out there and figure out which one will work best for your needs. But when you find a common language with designers from all over, it makes things much easier.
There’s no other program that can match Photoshop when it comes to sheer power and versatility. There are numerous ways you could use this software. These include photo editing, graphic design, animation work, or 3D modelling. Most importantly, Adobe Photoshop is a standard for creative professionals. It has the power to do anything. It also speaks a language that everyone understands.
3. Your child will be far ahead of your peers when you know Photoshop better.
Students who don’t know how to use Photoshop will find themselves at a disadvantage in the real world. The program offers so much creativity and opportunity. But if you won’t take advantage of these features, you won’t be able to maximise its capabilities. These include the Adobe Creative Cloud, which helps learners create something unique when needed most.
4. Photoshop fosters problem-solving skills.
Photoshop is a highly valuable skill set that will help your child solve problems and go further throughout their lives.
Educators often focus on giving students the answers and forgetting how they got there in school. But life is filled with problems that can’t be solved by memorisation or instinct. Your kids must figure things out. Learning Photoshop will help your child develop skills like logical thinking and creative problem-solving. That way, they will have an edge when facing new challenges in their future careers.
As parents or guardians, it’s important to give youngsters many experiences to reinforce their current knowledge. That way, they’ll be better equipped to get through whatever hurdles they’ll face in the future.
5. Photoshop helps improve focus.
Photoshop gives children the opportunity to use their creativity to enhance how they see and interact with reality. As they progress through these lessons, you can bet your child will be using more than one angle on what is happening before them.
With Photoshop, your child can also create imaginative work from scratch. They’ll understand how working with less distraction lets them focus better and become more creative.
How to Learn Photoshop
Here are several ways your child can learn Adobe Photoshop:
Joining nearby computer institute that teaches graphics designing or Adobe Photoshop
Watching YouTube videos and applying those learned ideas and skills at home
Enrolling in online photoshop courses for kids and teens
Hiring an Adobe Photoshop expert or teacher to train you
Adobe Photoshop is a powerful program with endless possibilities for what you can create. But, like any other skill, it takes time and practice to learn how to use all of its features effectively. Remember these compelling reasons to learn Photoshop and how you can do so.
Is your child ready to get started? Adobe offers a range of great tutorials for beginners. You may also hire private tutors to educate your child. Once your kids start learning the basics, they’ll be able to apply those skills to more complex projects in no time at all. With a little effort, they could be on their way to becoming Photoshop pros.
Best Image File Format for Photographers
5 Best Image File Formats for Photographers by Alexandra Bateman on Nov 14, 2022

Do you want to know which image format is best for you? Saving your images in the right file format for your project will save you from the hassle of working with low-quality images in the long run. Believe it or not, something as simple as file type can make printing your photos a breeze — or a pain! In this guide, we will share the best image format and their features.
Image file formats exist in more types than you’ll likely ever need to know. Here, in this article, we’ll talk about the most frequently used file types. These file types are compatible with industry best photo editing software so you’ll always be able to edit them in the future.
Without further ado, let’s look at the best image file formats and their different features:
Best Image File Formats for Photographers to Use
1. JPEG
JPEG stands for Joint Photographic Experts Group, and it’s extension is widely written as .jpg. This most used image file format is used to store photos all over the world, and is generally a default file format for saving images. In fact, most of the images you find online will download as .jpg files.
JPEG files come in different quality levels like low, medium and high. Low quality JPEGs are more compressed than high quality versions. So, if you need a high quality image, you’ll need to choose a less compressed JPEG option.
Most commonly, JPEG images are great for sharing on social media, via email and on websites. These files are relatively small, so they take up less space on your memory cards and computer storage. Beware, though, that saving images as JPEGs can compromise the quality of that image.
When to Use JPEG Image Format:
Complex images with a lot of different colors, like photographs
To compress highly detailed images
For print
2. PNG
PNG stands for Portable Network Graphics. It’s an important file format that helps a lot in photo editing. You can use PNGs for completely transparent backgrounds or drop shadows (partial transparency) for the great effects.
This image format will not sacrifice the quality and details of the photos, but that means that they are typically larger in size than JPEGs. Thus, PNGs are best for small images like logos.
When to Use PNG Image Format:
Images with transparency
Small images, like logos
Online
To retain the quality of a detailed image, provided that you have storage for a larger file size
3. GIF
GIF stands for Graphics Interchange Format, and it’s quite similar to PNG in terms of its image quality preservation. With GIF image files, you can also create short animations for web.
This image format has a smaller color range, so it’s not suitable for all photos. Like PNG, GIF images can be transparent. But, unlike PNG, GIF doesn’t support partial transparency, which means you can’t use them to preserve shadow effects in your photos.
When to Use GIF Image Format:
For simple images with few colors, like icons
For animated images
4. PSD
PSD stands for Photoshop Document. When you save an image from Adobe Photoshop, the program’s default is to save that photo as a PSD file. You can then use that file to edit the individual layers you created in Photoshop at a later time.
This file format is not suitable for web, nor is it suitable for clients because it isn’t versatile. However, it is one of the best image formats for maintaining the quality of your image over a long period of time.
You should save your edited images as PSDs, especially if you intend to revisit them in Photoshop for additional retouching. You’ll need to make sure that your layers are not merged before you save your PSD file, or you’ll lose some of your editing capabilities.
Because it contains so much information in different layers, the size of your PSD files will be quite large. But, the trade-off is access to the highest quality version of your images for printing.
When to Use PSD Image Format:
To save images you may edit again in the future
To retain the quality and detail of images you want to print
Of course, you can only save your images as PSD files if you work in Photoshop. You can get Photoshop here from Adobe’s site for only $9.99/month.
5. TIFF
TIFF stands for Tagged Image File Format, and it is known as the most used file format by photographers and designers. Images stored as TIFF files are best for post-processing, because they are not compressed at all.
With TIFF files, you can create all kinds of digital images. You can use TIFFs with any photo editing software to perfect your photos, and you can re-save TIFFs as any other file format. Although TIFF files take up more space on your devices, they provide you a lot of flexibility.
Many photographers choose to save TIFF files of all of their photographer on an external drive. That way, they can always return to them should they need to retouch or re-save their photos.
When to Use TIFF Image Format:
For images you want to store without losing details
For images you need to print
What’s the Best Image File Format for You?
We hope this guide has helped you to learn the best image format and their features. You may also want to check out our guide on how to upload large images in WordPress. If you find that your images load slowly on your site, we recommend taking a look at this ultimate guide to boosting website speed and performance.
Good luck with your file saving, and don’t forget to follow us on Twitter and Facebook for more free WordPress guides and resources.

