Using Patterns for Fills
Chances are, if you use Illustrator often enough, you are not going to be satisfied with basic color blends. You are going to want to create custom patterns to give your objects depth or just a more interesting look. You can make these out of objects or artwork you have created or imported from another program.
Illustrator comes with a few fill patterns, but we are going to show you how to make your own in a minute. Right now, though, let us just show you how to add a fill from the swatches panel.
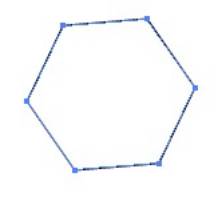
First, we are going to create a simple shape. We have chosen to use a polygon tool for this demonstration.
Now launch the Swatches panel. You can find it in the panels bar on the right side of the screen. Its icon looks like this.
Go ahead and click it to expand the Swatches panel.
Here you can see there are a variety of predefined color swatches you can use to create a fill. When you create your own patterns, they will be stored here. To use these swatches as a fill, just make sure the object you want to fill is selected, and then click on one.
To fill our polygon, we are going to use the brown swirly-patterned swatch that is three rows down, and three columns over.
You can see that instead of a solid color, we now have an intricate pattern inside of our shape.
You can also create patterns using shapes.
We are going to walk you through the process of making a simple pattern using a colored star shape. Practical, hands-on experience is the best way to become familiar with a process.
First, we are going to create a star shape, and color it red.
You do not need to worry about how large it is. Illustrator will resize it when it creates the swatch.
With the object selected, choose Object from the menu bar, then Pattern > Make. Two windows will open. One simply informs you that a new pattern has been added to the Swatches panel.
Creating and Working With Gradients
A gradient is a transition between different colors, or even between different shades of the same color. Below is an example of a gradient that goes from yellow to orange.
To create a gradient fill, make sure the object you would like to apply it to is has been selected, and then expand the Gradient Panel in Illustrator. Its button looks like this.
Click OK.
Our pattern is now in pattern editing mode and looks like this on the artboard.
The Pattern Options dialogue is also open so that we can edit our pattern.
Take another look at the artboard. The stars are in a regular pattern that might not look that great as a pattern. You will notice that our original star is outlined in blue in the center of the pattern. To change the spacing, click on this star and drag it to a new position. We have also rotated the stars slightly. This is the result.
In the Pattern Options window, we are going to rename our pattern. Simply click into the Name box and type a new name. We will call ours "Stars."
You can also change the way the stars are tiled. In our example, tile type is Grid, which is the default. You can select the height, width, horizontal spacing, vertical spacing, overlap, and more.
When you are finished editing the pattern, you can save a copy, or click "Done" at the top of the window.
Your pattern is now saved in the Swatches panel and can be applied to an object.
To edit the pattern later, you can open the swatches panel and double-click on it. This will relaunch Pattern Editing mode.
Let us take a closer look at the Gradient panel.
Here you can select whether you would like a radial gradient or a linear one. The first example we showed you is a linear gradient. Below is an example of a radial one.
As you can see, the gradient goes from yellow in the center, to orange at the edges.
Use the Type drop-down to select either radial or linear.
You can select the color, the angle, the opacity, and more.
Gradient Swatches
You can select and apply gradients from the Swatches panel. To do so, launch the Swatches panel and click the Swatch Libraries menu. From there, move your mouse over "Gradients" in the list.
Examine the list of in the example above to see what options are available to you.
Gradients can apply to stroke as well as fill, and in much the same way.
Creating Your Own Gradients
You can create your own gradients and add them to the swatch library.
To do so, we are going to go back to Gradient panel.
Remember the color bar at the bottom of the Gradients panel? It looks like this.
Interested in learning more? Why not take an online Adobe Illustrator course?
You can drag the handles to change the length of each shade of color, or you can click on them and select a color from the color chooser. In the next example, we have changed orange to bright red, and the yellow to blue. (These handles are called "Color Stops"). To add a new Color Stop, click in any empty area at the bottom of the color band.
You can use the diamonds at the top of the bar to increase or decrease the length of the transition. The trash can icon on the right allows you to delete a color stop. It is only active when a Color Stop has been selected.
To save your gradient, simply click the arrow to the left of the Type box. At the bottom of this, click the Add To Swatches button.
The gradient will then be available for you to use again.
Using the Gradient Tool
The Gradient tool on the toolbar gives you one more way to create and edit gradients. Simply select this tool, and then drag it over the object that you would like to apply the gradient to.
As you can see in these examples, you can quickly and easily create a gradient from any angle and at any orientation. The first example makes a simple linear gradient from left to right. The second creates a gradient at a near 45-degree angle.
When you hover your mouse over this line, a color bar appears, allowing you to create or manipulate Color Stops, in much the same way you could in the Gradient panel. The bar is called a Gradient Annotator.
Positioning the bar in different places on the object affects the gradient. Take a moment to experiment with the different positions.
Points and Paths
Illustrator's vector drawing tools are the pen tools. When you use the
pen, Illustrator creates a path and stores the information about the path. The paths are defined mathematically with anchor points and segments. You can modify paths at any time.
In this article, we are going to learn about Illustrator's pen tools, as well as creating simple and complex paths.
Drawing with Pen Tools
You use the Pen tool to create a path. The path is made up of curved and straight segments. Anchor points create these segments. When you click the Pen tool (
in the toolbox), you can draw corner points and straight segments. If you drag the Pen tool, you can create smooth points and curved segments. These segments will have direction handles so you can change the direction of the segments. You can use Smart Guides to help you align segments, as you will see in this article.
That said; let us use the Pen tool to create a Polygon.
First, click on the Pen tool.
Click on the artboard to create an anchor point.
If you want to draw segments that are constrained to 45 degrees, hold down Shift as you click.
Now, click to create a second anchor point in a different location.
As you can see, a line segment appears between the two anchor points that you created.
Continue to add anchor points to create your shape.
To create a closed path, connect your last anchor point with the first anchor point. Remember, a straight line is an open path. A circle is a closed path. So is a polygon.
Next, let us learn to draw a curve with the Pen tool.
To do this, you are going to click to place the first anchor point, just as before, but now you are going to click and drag. Notice the handle in the snapshot below.
Now, release the mouse and move to where you want the second point to be.
Click and drag again.
As you can see, your curved line appears between the two points.
The shape of your curve is defined by the length and direction of the handles.
You can add more anchor points and handles.
Click on the Selection tool when you are finished to see your shape. Remember, just as with lines, segments are drawn from the previous to the new anchor point. To create a closed path, connect the last point with the first.
Set Anchor Point Preferences
The Selection and Anchor Displays preference will let you set selection and anchor options when working with the Pen tool. Using this, you can set how handles and anchors appear. As you use Illustrator, you will discover that it is easier to select anchor points when they are highlighted on Mouseover simply because they are easier to find and click on.
Let us learn how to do this.
Go to Edit>Preferences. Then go to Selection and Anchor Display.
Now, you can select the Anchor Point and Handle Display options that you want. This is a personal preference. Choose what you will find easier to work with. Click OK when you are finished.
Moving Anchor Points and Segments
Let us say that you draw a segment on the wrong part of your artboard and you want to move it, or let us say that you need to move an anchor point. If you move a segment, the anchor points move with it. However, if you move an anchor point, the segments connected to the anchor point change. If you move a curved segment, the curve will change, but the anchors remain the same. If you want to change a curved segment, you can do so by adjusting a direction point on the direction handle.
Let us learn how to move points and segments to see what we mean.
To move an anchor point or segment, select the Direct Selection tool in the toolbox.
Next, click a blank area to deselect all points in the active area.
Now, drag an anchor point or the middle of a segment, as we have done below.
If you want to make a smaller move, click and hold the anchor point or segment, and then use an arrow key on your keyboard. If you want to reshape a curve, click an anchor point or curve segment, and then drag a direction point at the end of the direction handle.
Convert Points
Paths can have two types of anchor points, smooth or corner. A smooth anchor point connects two curved segments and creates a smooth line. A corner anchor point connects two straight or curved segments to create a change in the path direction.
Look at the curve that we drew below.
To convert the point from a smooth point to a corner point, we go to the Control Panel.
The first button is Convert to Corner. The second is Convert to Smooth.
Let us click Convert to Corner.
The point that you selected is now converted to a corner point.
You can also convert points by using the Convert Anchor Tool.
To use the Convert Anchor tool, select it in the toolbox. It looks like this.
To find it, click and hold on the Pen tool, and then select the Convert Anchor tool from the menu.
Now, to convert a corner point to a smooth point, drag a handle from the corner point. To convert smooth to corner, click a smooth point.
Here we have a corner point.
We are going to click on the Convert Anchor tool to turn it into a smooth point. We click on the point, and then drag.
Add and Delete Anchor Points
In Illustrator, you can add, subtract, or delete anchor points to modify a path. You can also modify the points to conform to a shape. Let us show you what we mean, and how you can add and delete anchor points to modify paths and shapes.
Here is how to add anchor points:
Go to the Direct Selection tool in the toolbox.
Now, select the object for which you want to add an anchor point.
Now, go to Add Anchor Point in the toolbox. It is grouped with the Pen tool and looks like this.
Click on the path once to add a new anchor point.
The new anchor point is added.
Now, click the Direct Selection tool again, and then click and drag on the path to add and modify the segment.
To delete an anchor point, go to the Delete Anchor Point tool located with the Pen tool.
Click on an anchor point to delete it.
We deleted the upper right point from the illustration above:
Align and Join Anchor Points
In Illustrator, you can also align anchor points on a path along the horizontal and vertical axis.
To do this, select the Lasso tool in the toolbox.
Now, drag your mouse to select two or more points.
Now, click the Align To button in the Control Panel.
Now, you can align to selection, align to key anchor, or align to artboard. We are going to align to selection.
Now, click on one of the align or distribute buttons on the Control Panel.
We chose Horizontal Align Left, or the first button on the left.
Take a look at our shape.
As you can see, the points have been aligned.
Join Anchor Endpoints with a Straight Line
To join anchor endpoints with a straight line, click on the Direct Selection tool. Shift+click on the two endpoints you want to join.
Click Connect Selected Endpoints in the Control Panel.
The two endpoints are now connected.


