Become a Master of Adobe InDesign Master Pages
Whitney Holden is an award winning graphic designer, creative director, design mentor, artist, entrepreneur, and proud Mommy. She currently owns and operates her own design and illustration studio.
If you’re designing anything with multiple pages or repeating elements, Master Pages are a time-saving game changer.
Think of Master Pages as a template that you can apply to any page of your document. Whatever is placed on a Master Page will appear on the designated page(s), and you can create more than one Master Page, depending on your design needs. Whenever you change the Master Page design, that change automatically applies to those designated pages and won’t move unless you have overrides (more on that later).
How to Create a Master Page
Would you be surprised if I told you that you already had a Master Page in your InDesign file? Well, you do. All InDesign files have one Master Page applied by default. Check out the top of your Layers Panel and you’ll find the default labeled A-Master. Double-click on the page thumbnail to work within the master. You can also rename the master by right-clicking on its name and selecting Master Options for A-Master.
Master Pages appear as a spread by default, but you can delete one if your design doesn’t have facing pages.
Using Layers with Master Pages
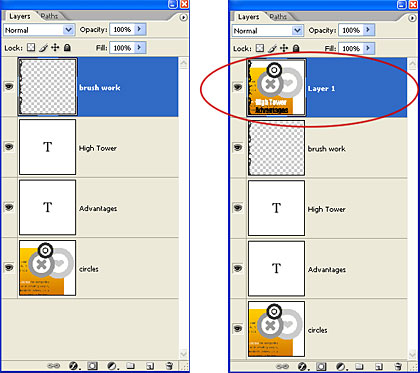
It’s important to understand that the items on your Master Page also live on layers just like anything else in your design. If you only have one layer in your document, your Master Page objects will appear behind elements that you apply to your non-Master Pages. If you want to avoid covering up your Master Page items, simply make a new layer that’s above the others. You can design on multiple layers within your Master Page. In the example below, I have a colored box on one layer, and a text frame on another.
Rename your layers by double-clicking on them. Any new layers or changes you make to the stacking order are universal.
Page numbers are the most common use for Master Pages. Headers and footers are also perfect Master Page fodder. With your numbering automated and securely placed on a master, you don’t have to worry about accurately numbering pages by hand.
To set up your page numbers, select your placeholder number, right-click, and go to Insert Special Character > Markers > Current Page Number. Your page number will appear as the suffix letter of your Master Page (in this case, A). Within your document, it’ll automatically populate with the page number as it appears below the page thumbnails in your Pages Panel.
My example A-Master page is a spread, so I’ll repeat this on the opposite page.
Applying Grids and Guides to Master Pages
Not everything that you apply to a Master Page has to be a design element. You can create Master Pages with different grids and guides to help you with the underlying structure of your multi-page layouts. And, you can do this without having to copy/paste common elements (like page numbers) on every single new master.
To create a new Master Page, you can click on the plus icon at the bottom of the Layers Panel or go to the hamburger menu and click New Master. Select A-Master in the Based on Master drop down, and hit OK. Now you have applied a Master Page to your new Master Page! You can have masters all the way down with an elaborate nesting system, but for now, let’s keep it simple.
New Master Pages will be assigned a prefix in alphabetical order.
Now I want to apply a grid to this spread. So, I’ll select both thumbnails in my Pages Panel and go to Layout > Margins and Columns.
Here, you can adjust the margin (space around the page), number columns, and the gutter (space between columns).
I also dragged a guide down from the top ruler for my subheadline placement. You can add as many guides as are helpful, or create your own modular grid system on your Master Pages using Layout > Create Guides. The beauty of this technique is you can apply Master Pages to individual pages, having two different masters in play on one spread!
This spread shows the A and B masters in action together, applied by dragging the desired master onto each page’s thumbnail.
How to Override Your Master Page Items
Let’s suppose I don’t want the background color on page one of my document, but I want to keep the page number. I can override any object by holding down Command + Shift while clicking on it. The object is now editable on my page and I’m free to move, change, or delete it.
If you want a completely blank page, you can apply the [None] master by dragging it onto your page’s thumbnail.
You can also right-click on your page’s thumbnail in the Pages Panel and select Override All Master Page Items to make sweeping changes to your page layout.
How to Turn Any Page into a Master Page
Master Pages aren’t just for multi-page books and brochures. They can be extremely handy for building out single-paged iterative designs, like a set of business cards. In this new example, I have my business card design ready to go on page one of my InDesign file, but I want to make it a Master Page so that I’m only editing the text and all other elements stay in place.
I do this by grabbing the thumbnail for page one and dragging it up to the Master Page section of the Pages Panel. This creates a clone of your layout as a new Master Page. Now I can create new pages and apply the new master by dragging it onto the page’s thumbnails, overriding the text box, and entering the new information.
Master pages mean fewer moving parts and a more consistent design.
Master Your New Master Page Skills
These foundational techniques take practice to use effectively, but once you get into the habit of using Master Pages, you’ll reap the benefits of time saved, fewer errors, and a more professional-looking designs. Try applying these learnings to your next project and you’ll earn your black belt in Master Pages in no time!
For more InDesign tips and advice, take a look at these articles:
How to Set Up Master Pages in Adobe InDesign CC
InDesign, the desktop publishing application that’s included in an Adobe Creative Cloud subscription, is ideal for designing virtually any document, from flyers, posters, and brochures to longer documents like books, magazines, and ebooks.
Master pages don’t really matter if you’re designing a single page. However, if the document you’re creating with InDesign has multiple pages—and you want some elements of each page to persist throughout the document—then you’ll definitely make your life easier by learning how to set up master pages in Adobe InDesign. The whole point is to apply changes to multiple pages of your document.
Table of Contents
What Is a Master Page in Adobe InDesign?
Master pages rule over the layout of the whole document. In other words, if you change something on the master page, you’ll see that change on every page of your document to which the master page has been applied. This is really handy for elements you want to appear on every page.
Let’s say you’re designing a multi-page booklet, and you want to have the same image appear at the top of each page. You can add that image to the master page. In doing so, you’ll guarantee that its placement, dimensions, and formatting are standardized across your document.
Can You Have Multiple Master Pages?
Yes. In fact, when you create a new document in InDesign, you automatically have two master pages to choose from, the A-Master and None. As you might imagine, the None master page doesn’t include any elements of other master pages. It’s blank.
Furthermore, the A-Master typically includes a left and a right page. That’s understandable because if your document is designed to open like a book, you’ll want things like the page number to be in a different place depending on whether the page is a left-hand page or a right-hand one.
How to Edit and Apply Master Pages
To access a document’s master pages in Adobe InDesign, select the Pages panel from Windows > Pages. All the masters will appear at the top of the Pages panel. Below the master pages, you’ll see every page of your document. Take a look at the screencap below.
At the top of the panel, you can see the None and A-Master pages. Then, below the spacer, all of the pages in your document appear as spreads. In this example, page 1 is the front cover of our document, and all subsequent pages are listed below that.
Note the A in the top corner of the pages. That tells you that the A-Master has been applied to those pages. You can also hover your mouse over any page in the Pages panel, and a tooltip will appear, telling you which master page has been applied to that page.
To modify the A-Master, double-click on it in the Pages panel. (You can confirm which page you’re editing, master or otherwise, by looking at the bottom of the InDesign window). You’ll see the name or number of the page in the drop-down page selector.
You can add or change anything you want on the A-Master. Let’s add an image to the left and right pages of the A-Master.
Now go back to your document, and you’ll see that the image appears on every page that has the A-Master applied to it, and you’re unable to select, edit, or delete the image. Perfect.
But hang on, maybe you don’t want the front cover to have the same elements as the rest of the pages in your document. Applying a different master page is a snap. Right-click on the page in the Pages panel and select Apply Master to Pages.
In the Apply Master dialog that appears, choose a different master page from the dropdown list. Continuing our example, choose [None]. In the To Pages dropdown, choose the page you want the [None] master page applied to—in this case it’s page 1, the cover page. Then select OK.
You’ve applied the [None] master to page 1, and by selecting page 1 in the Pages panel, you can see that the changes were applied. Page 1 no longer has any of the elements from the A-Master applied to it. It looks like a blank document again.
How to Create a New Master Page
If you want to design a document that reuses multiple layouts, then you’ll need multiple master pages. Create a new master page in the Pages panel by right-clicking somewhere in the list of existing master pages. Select New Master.
In the New Master dialog box, choose the Prefix for the new master page and give it a Name. Then choose how many pages this new master should include and the Page Size. You can also specify the width, height, and orientation of the new master. Finally, select OK.
Once you’ve created a new master page, add any elements you want to it. Then you can apply it to a page in your document by dragging the icon of the new master page onto the page icon you want to apply it to. Or you can just right-click on a page in the Pages panel, select Apply Master to Pages, and select the correct master for that page.
Can You Override or Unlock Master Pages?
Yes! Let’s say there’s only one thing you need to change about the master on a page in your document. Rather than creating a whole new master page, you can override the master page you’re already using.
Go back to the Pages panel and right-click on the page you want to modify. Then select Override All Master Page Items. Now you’ll be able to select any element on the page and change or delete it.
Is It All Too Much?
There’s a learning curve to most apps in Adobe’s Creative Cloud. Even though the apps are robust and many are industry standards, sometimes it’s easier to stick with programs you’re more familiar with. In that case, you might want to check out how to design a document in Microsoft Publisher or Word. We won’t tell!
InDesign master pages
Introduction to InDesign Master Pages

InDesign Master Pages can be referred to as Parent page that means if you want to have some type of element on each pages of your document layout design then you can create that element or paste that element on the Master page only and it will apply to all your selected pages of a document. There are some other things which we can do for having different variations although we applied our desired element on all pages using the master page. The element which we have used on the master page is not editable on the normal pages of documents directly but there are some ways through which we can edit them for a specific page only. So let us analyze all possible aspects of Master Pages so that we can understand its working methodology.
How to create and use Master Pages in InDesign?
There is one master page by default on the Pages panel of this software and we can use it for creating master elements but if you want you can add a number of master pages as per the need of your design layout and for proper organization of your designed layout work. Today in this article I am going to tell you how you can work with the master page and add new master pages in InDesign.
Start Your Free Design Course 3D animation, modelling, simulation, game development & others
So first I will create a new document page of Letter size and for that, I will choose a Letter page size from this New Document dialog box.
Here on the user screen of this software on the right side, we have different panels and in this section, you will find the Pages panel if the workspace is in Typography mode.
If there is no such panel, then don’t worry about it just go to the Window menu, and here in the scroll down list of it you will find the Pages option or you can press the F12 functional key of the keyboard to have this panel on your user screen of this software.
Let us first insert some page here in our document and for that click on the top right corner button of the Pages panel and click on the Insert Pages option of scroll down list.
I will insert 10 pages.
Here in this box, you can choose A-Master as the master page for inserted pages. I have currently only Master Page A so I will go with it.
You can see all inserted pages have the letter A written on them which means all pages are linked with Master Page A.
Let us have some content on any page of the document. I take this EDUCBA logo for this purpose and I want this on the all pages of this document.
So for having it on all pages go to the Pages panel and make double click on pages of A-Master for selecting it.
And now I will paste this logo on the left side page of A-Master and you can see when I paste it here it will automatically come on the other pages.
You can see it is not applied on the page 1. So let me tell you a reason for this.
I will first take a rectangle tool.
And create a rectangular shape on the top of the right side page of A-Master. Now you can see it is come on the page 1 also. So you should keep in mind that on which side of the page you want to use your desired element.
Now I am on page 2 and want to make some modifications to this logo but you can see I am unable to select it because it is an element of the master page and can edit only from the master page.
But there is one shortcut key through which we can modify this element only for the selected page. The shortcut is, hold Ctrl + Shift button on the keyboard and then make click on an element of the master page of your selected page. Once you make a click you will have a transform box around your object and now it is editable for this specific page.
If I flip it horizontally.
Then you can see this change apply on the current page, not on all pages that have the master page elements.
If you are not satisfied with your editing and want to make it again master page element, then simply pick the master page that has this element from the master page layer and drop that on this page with the help of the mouse button.
And it will again become a master page element. You can also retrieve all changes for the master element in one click and for that click on the top right corner button of the Pages panel. Go to the ‘Master Pages’ option of this list and choose ‘Remove Selected Local Overrides’
And all editing will remove from normal pages.
Not only one master page but you can also have more than it. For having one more master page click on the top right corner button of the Pages panel and from the list choose the ‘New Master’ option.
Once you click on it a New Master Page dialog box will come. Here you can name it according to you, set its size, and so on. For this time I will go with a default setting of this dialog box.
And we have a new master page here in the master pages section with the name B-Master. I will create a circle on it but you can see it is applied on the pages of the document.
To apply this element you have to link pages with B-Master. For that select pages which you want to link with B-Master and make right click then choose ‘Apply Master to Pages’ option.
An Apply Master dialog box will open and it shows you the number of selected pages.
Here from the apply master list choose the B-Master option then click on the Ok button.
Now this element will be on our selected pages.
Conclusion
This way you can create a number of master pages and assign them to different pages of documents for having a good organization of several elements of your designed layout. You can explore other parameters of Master page sections for having more understanding as well as more command on it.
Recommended Articles
This is a guide to InDesign master pages. Here we discuss How to create and use Master Pages in InDesign step by step in detail. You may also have a look at the following articles to learn more –
0 Shares Share


